Completing a Form task
In brief
A Form task requires you to enter data into a form that has been created by the assigner. Note that you are able to save the form as a draft and revisit it at later date.
Required permissions
Can view their own tasks
Opening the form#
To open the form you need to complete, please navigate to Tasks and find the relevant task. Note, you can complete Form tasks from both the 'List view' and the 'Table view'.
Alternatively, if you've clicked the link in your task assignment email, you should be taken directly to the task.
List view#
Once you've found the correct task, you will need to open the form. You can do this by clicking the blue 'Complete form' button.
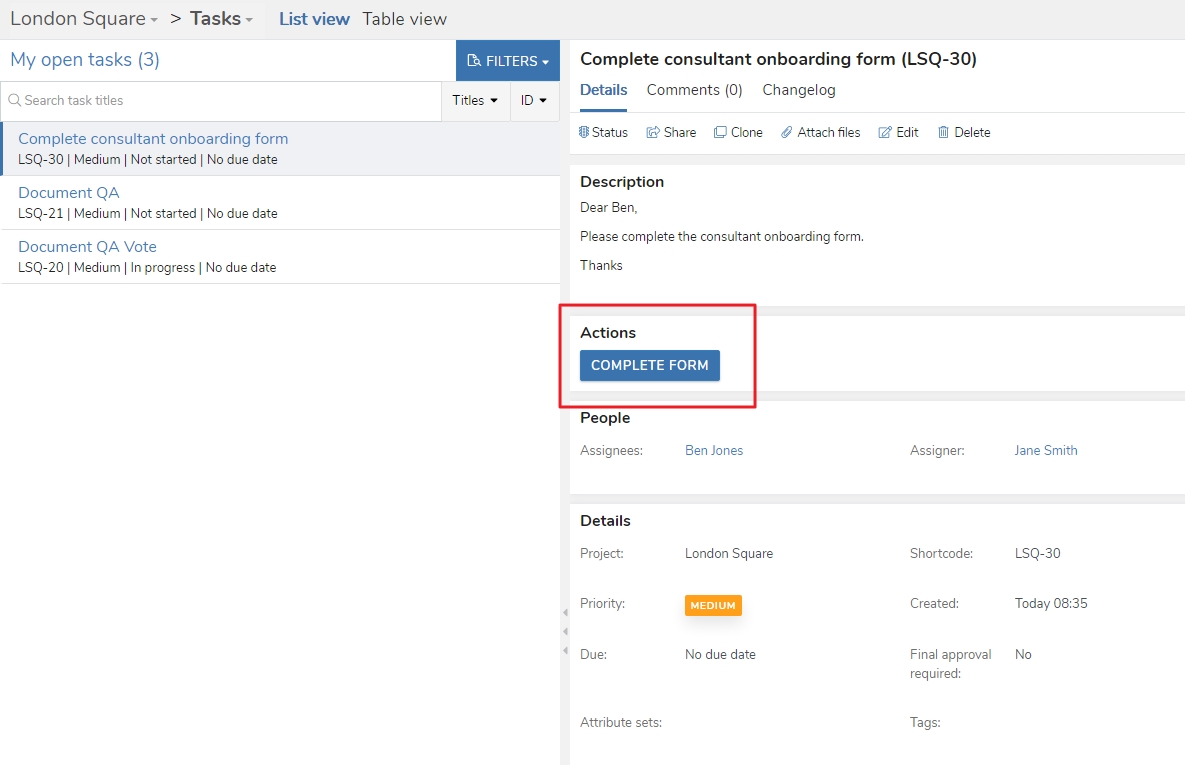
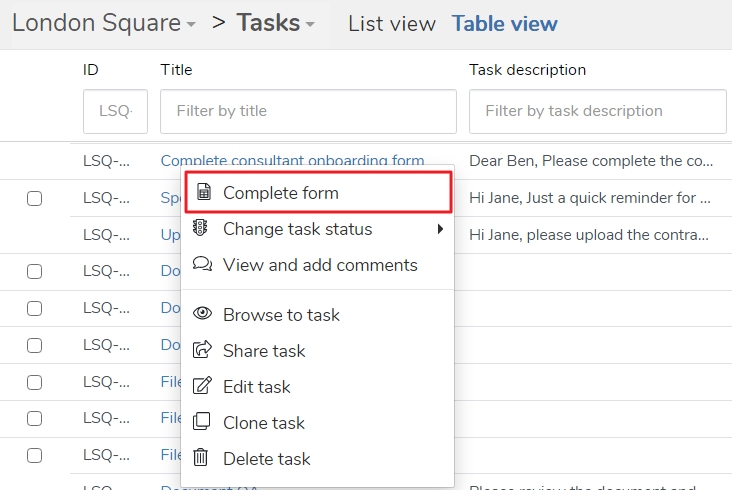
Table view#
Once you've identified the task, click the task title in the 'Title' column, or right click the task row. A menu will appear in which you can select 'Complete form'.
Form layout#
The form you need to complete will open in a new tab. For the purpose of this guide, we've created a small onboarding form to demonstrate some of the form's features.
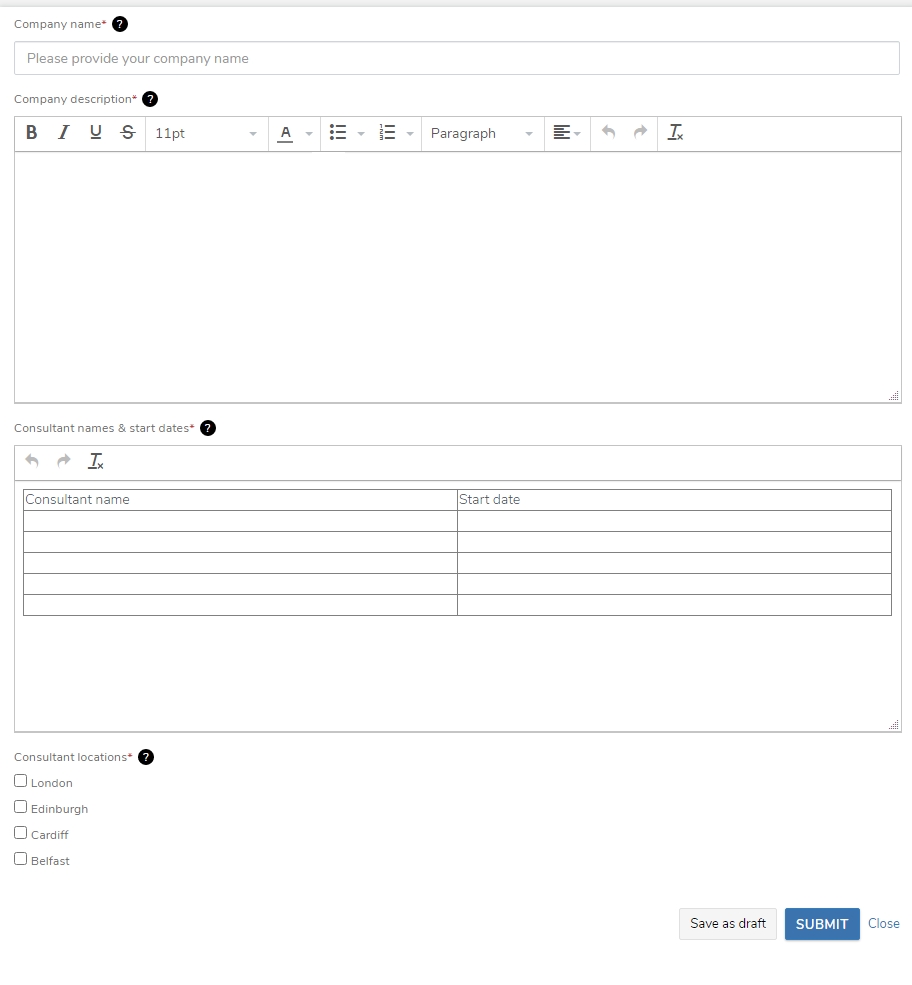
Field types#
As you can see, the form consists of a series of fields we need to complete. There can be a variety of field types, but the most common are:
- Text input ('Company name') - a single row designed for small pieces of information
- Textbox ('Company description') - a larger area for entering text with basic text editing capabilities (bold, underline, etc.)
- Table ('Consultant names & start dates') - an area where tabularised data can be provided
- Checkboxes ('Consultant locations') - allow the indication of whether an option is true or not by checking the box
For both the textbox and table field types, it's worth noting you can increase their size by clicking, holding and dragging the bottom right corner of the field. Furthermore, for the table field, you can add extra rows by right clicking the table and selecting 'Insert row after' or 'Insert row before'.
Field details#
You'll notice each field name has a red asterisk beside it. This means the field is required - you won't be able to submit your form until all required fields have been completed. You can save the form as draft, however.
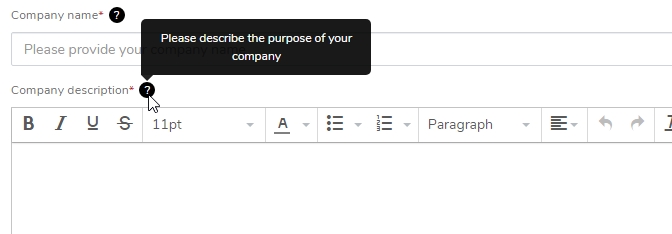
You'll also see that there is a black circle with a question mark over it beside the field name. These may or may or not be present dependent on whether the form creator has added them; however, if you hover over them with your cursor they provide additional information about the required information for that field.
Completing the form#
To complete your form, simply click through each field and enter the required data.
Good to know
Copying from Word documents and similar into textbox fields is supported. Furthermore, you can copy from Excel into the table fields. Just make sure that you're copying the same number of columns as there are in the form table.
Submitting the form#
Save as draft#
If you have partially completed your form and wish to revisit it later, click the 'Save as draft' button available at the bottom right of the form. This will mark your task as 'in progress' and let the assigner know you've started. Exaprojects will also generate a Word document of your form and save it in Project Files such that the assigner can review any data you've entered so far.
Submit#
If you've finished your form and are happy with its contents, you can click the 'Submit' button available at the bottom right of the form. This will mark the task as 'complete' and save a copy of the form to Project Files. Please be aware that you will be unable to further edit the form if the task has been marked 'complete'.
Good to know
Once you've clicked either button, you can close the tab. Exaprojects will have saved your entered data.